Set Windows Integration Authentication Mode
1. Set "Windows Integration Authentication" Mode
The method to set "Windows Integration Authentication" mode in Windows 2003 and Windows 2008 environment is different.
2. Setting Method in Windows 2003
If you have chosen the "Windows Integration Authentication" mode for AAMail database (Figure 1-1), something will be wrong when you directly login Webmail, then you need to add the "anonymous access user name" to the SQL Server login list.
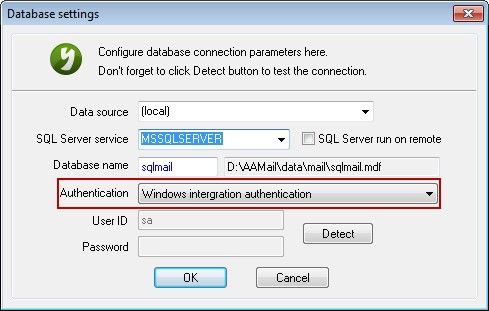
Figure 1-1
How to Find the Anonymous Access User Name?
Open IIS Manager, on the "Web Sites" directory tree, right click "Default Web Site" and select "Properties". Then click the "Directory Security" tab, and then click the "Edit" button. It will pop up the "Authentication Methods" dialog box, and you can find the "anonymous access user name: IUSR_WIN2003-ENT-32" (Figure 1-2).
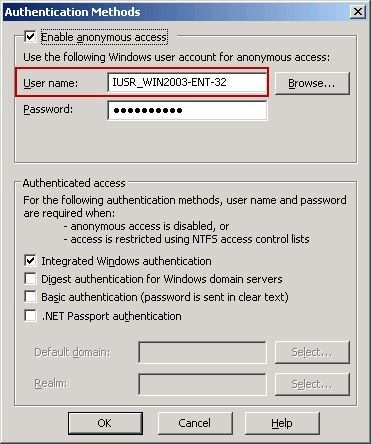
Figure 1-2
How to Add the Anonymous Access User Name to the SQL Server Login List?
1) Open the SQL Server Management Studio Express.
2) Expand the "Security" directory => Right click "Logins", and select "New Login..." (Figure 1-3).
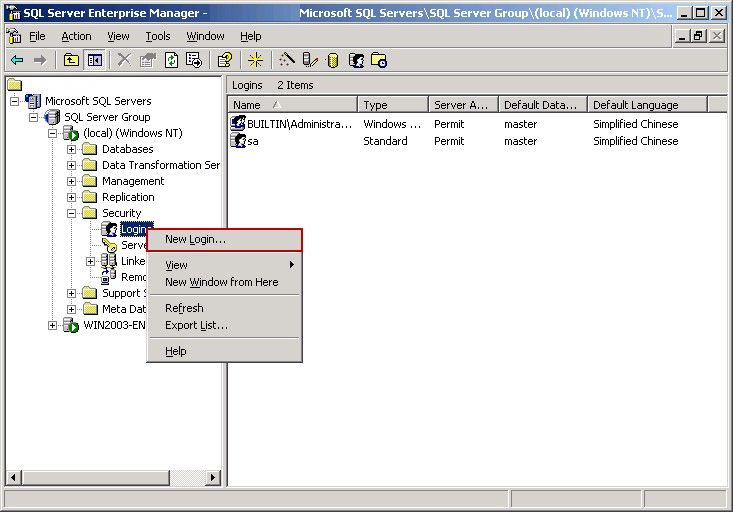
Figure 1-3
3) In the pop up "SQL Server Login Properties - New Login" dialog box, select the "Windows Authentication" radio button, and then select the "Grant access" radio button, and click the "..." button (Figure 1-4).
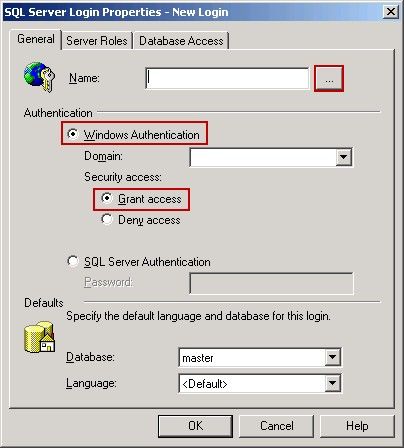
Figure 1-4
4) Select the "anonymous login account (IUSR_1-1F5B7A0D14414)", and click the "Add" button, then click the "OK" button (Figure 1-5).
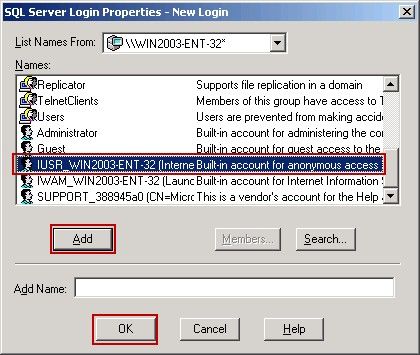
Figure 1-5
5) Click the "Database Access" tab, and select "sqlmail", "public", "aa_owner" check boxes. Then click the "OK" button (Figure 1-6).
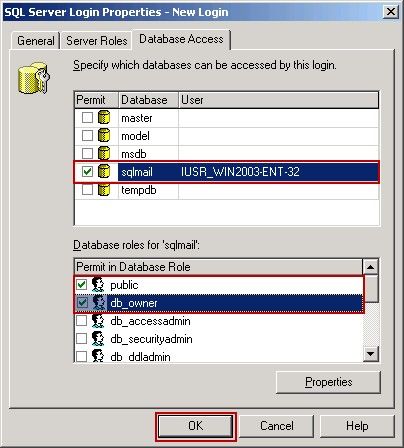
Figure 1-6
3. Setting Method in Windows 2008
Set IIS
1) Open IIS, and click the "Application Pools", then right click "DefaultAppPool", and select "Advanced Settings..." (Figure 1-7).
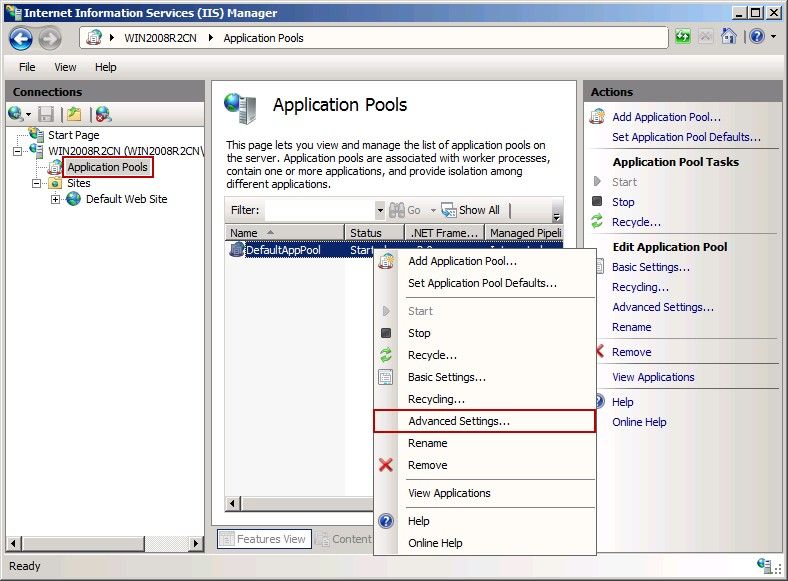
Figure 1-7
2) In the pop up "Advanced Settings" dialog box, click the "..." button on the right of "Identity", and then select the "NetworkService", and click the "OK" button (Figure 1-8).
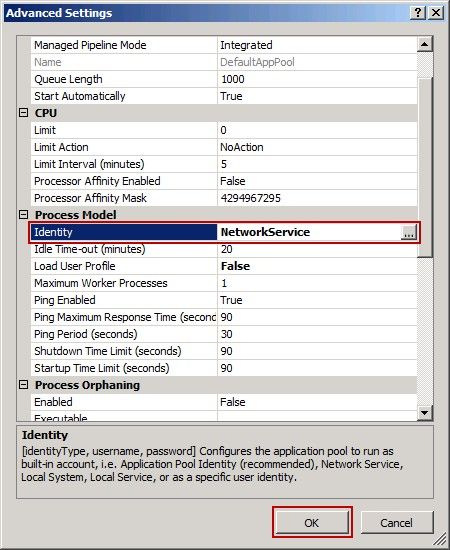
Figure 1-8
Set the Database
1) Open the SQL Server Management Studio Express.
2) Expand the "Security" directory => Right click "Logins", and select "New Login..." (Figure 1-9).

Figure 1-9
3) In the pop up "SQL Server Login Properties - New Login" dialog box, select the "Windows Authentication" radio button, and then select the "Grant access" radio button, and click the "..." button (Figure 1-10).

Figure 1-10
4) Select the "anonymous login account (IUSR_WIN2003-ENT-32)", and click the "Add" button, then click the "OK" button (Figure 1-11).

Figure 1-11
5) Click the "Database Access" tab, and select "sqlmail", "public", "aa_owner" check boxes. Then click the "OK" button (Figure 1-12).

Figure 1-12
Related: